OIDC Authentication (for AWS and GCP)
AWS OIDC Authentication
This feature is behind a Feature Flag CCM_ENABLE_OIDC_AUTH_AWS. Contact Harness Support to enable it.

OIDC authentication allows secure access your billing data and perform cost optimization without storing credentials.
To use OIDC, you need to create an OIDC identity provider in AWS.
Use the following Harness OIDC provider endpoint and OIDC audience settings to create your OIDC identity provider:
- Harness OIDC provider endpoint:
https://app.harness.io/ng/api/oidc/account/<ACCOUNT_ID> - OIDC audience:
sts.amazonaws.com
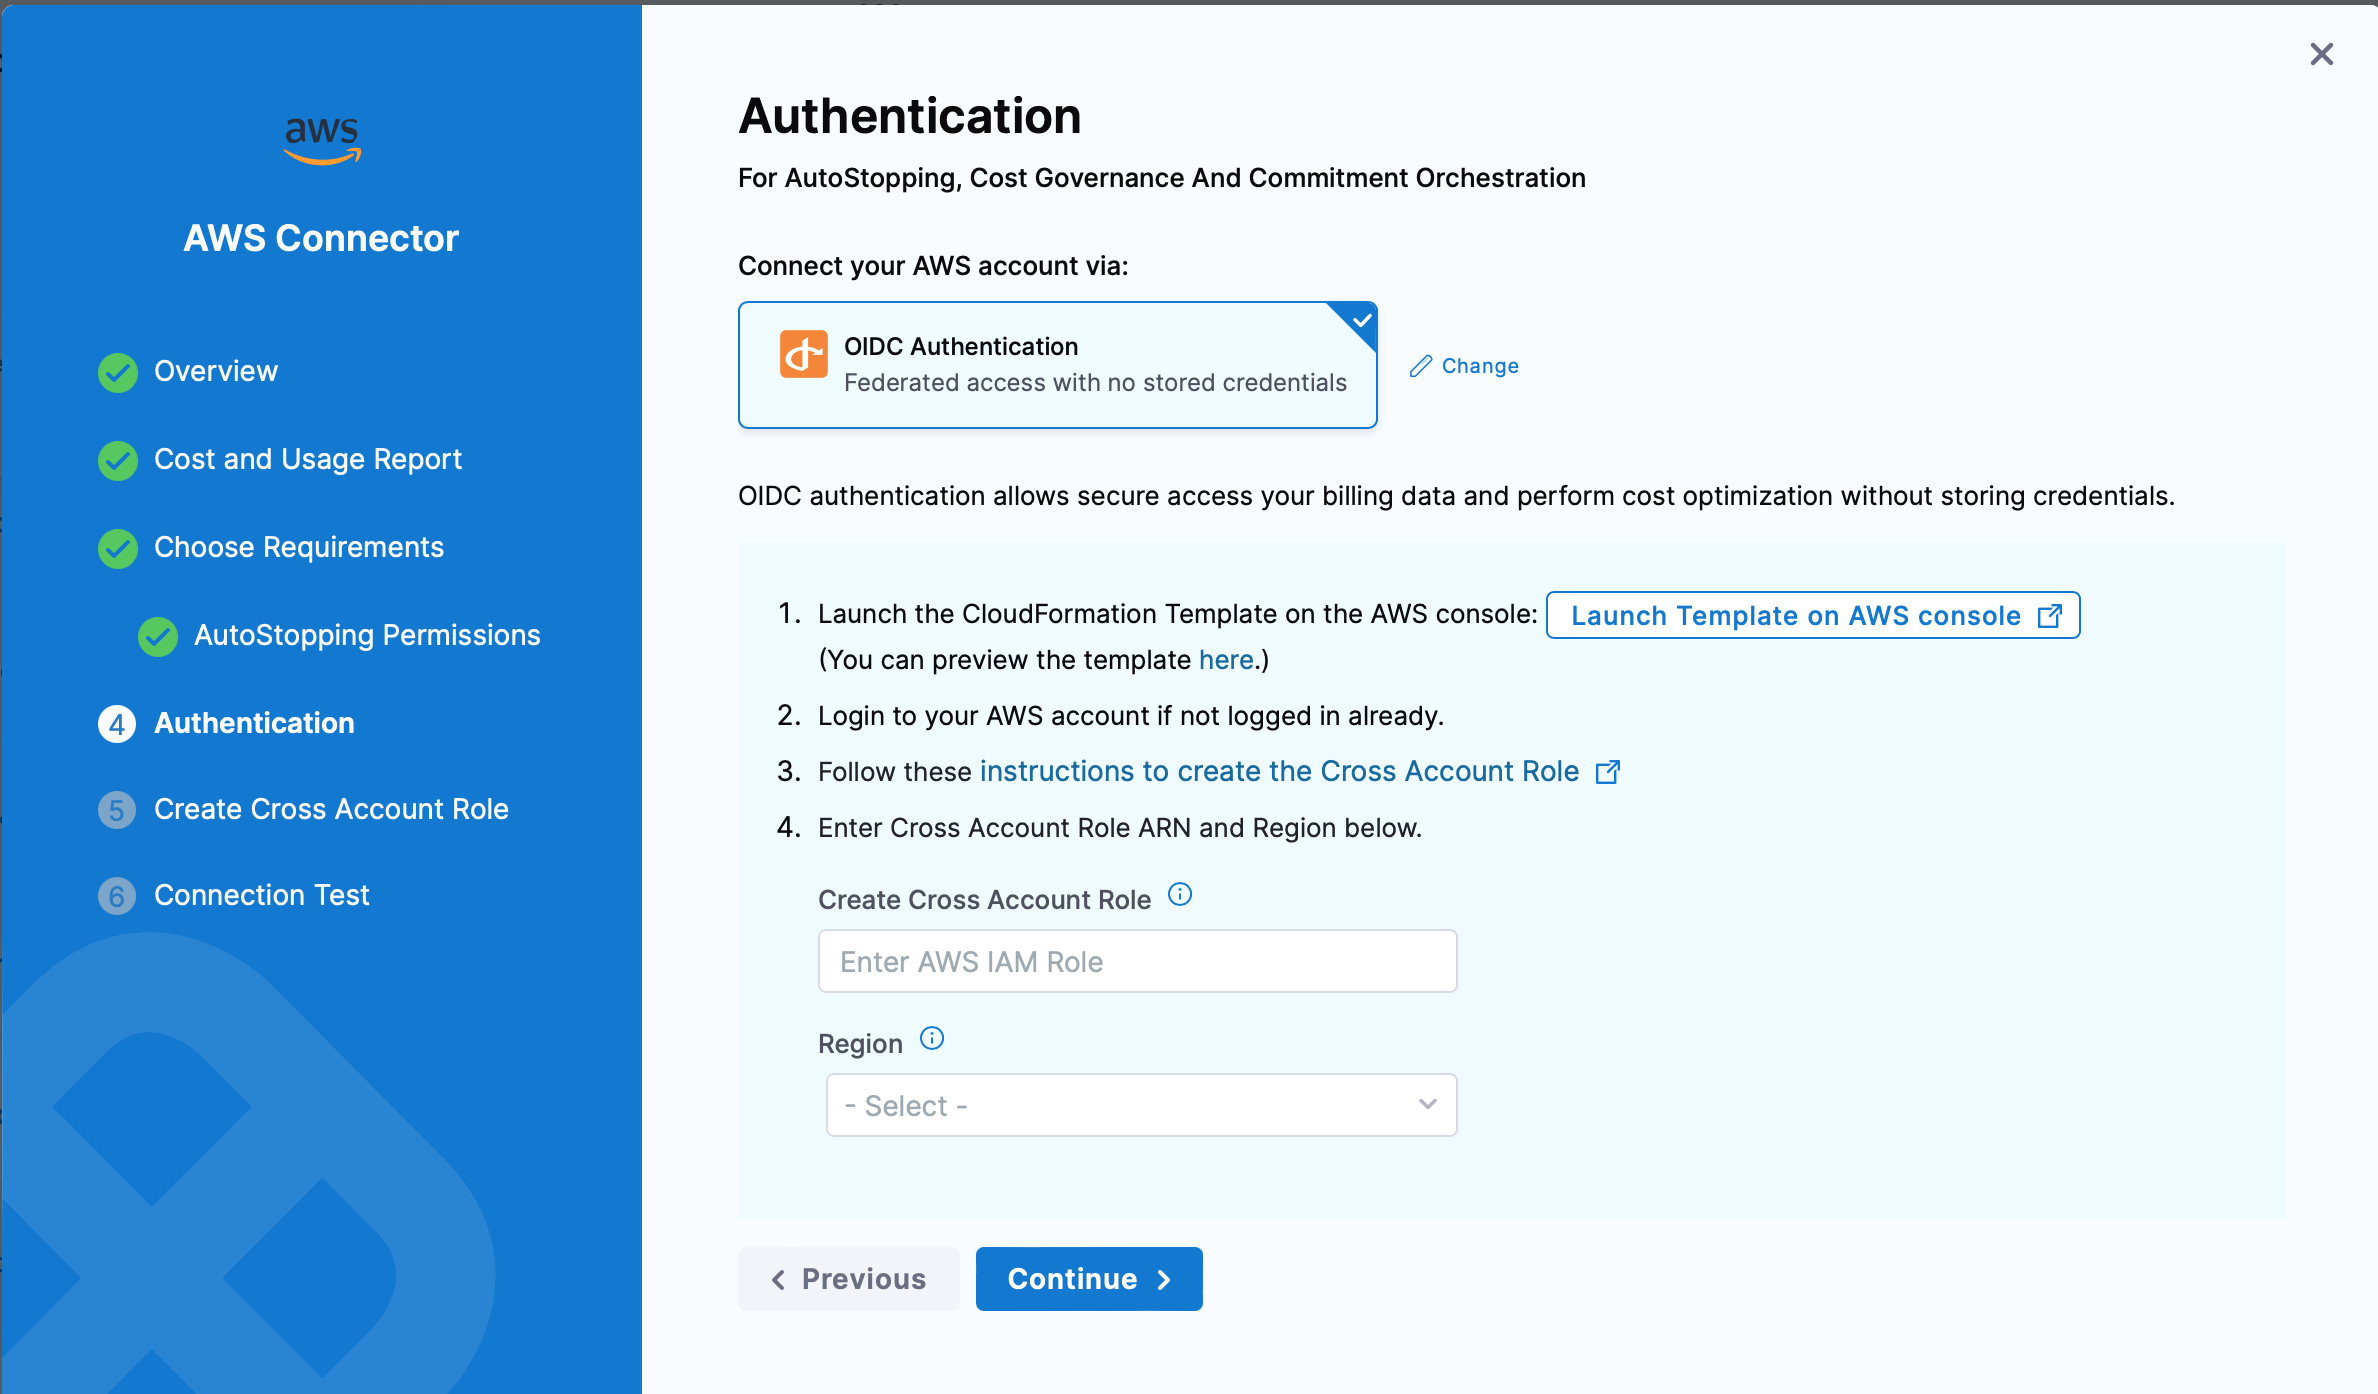
Follow the steps on the Authentication page to complete OIDC authentication:
- Launch the CloudFormation Template on the AWS console. You can also preview the template here.
- Login to your AWS account if not logged in already.
- Follow the instructions to create the Cross Account Role
- Enter Cross Account Role ARN and Region in the input boxes on the UI.
GCP OIDC Authentication
This feature is behind a Feature Flag CCM_ENABLE_OIDC_AUTH_GCP. Contact Harness Support to enable it.

OIDC authentication allows secure access your billing data and perform cost optimization without storing credentials.
To connect to GCP with OIDC, you must configure an OIDC identity provider in GCP and connect the service account with relevant permissions that Harness will use to operate in GCP. Use the following Harness OIDC provider endpoint and OIDC audience settings to create your OIDC identity provider.
-
Harness OIDC Issuer provider endpoint:
https://app.harness.io/ng/api/oidc/account/<YOUR_ACCOUNT_ID>. See below for more details about the Issuer URL format, depending on the environment cluster for your Harness Account. -
OIDC audience:
https://iam.googleapis.com/projects/<GCP_PROJECT_NUMBER>/locations/global/workloadIdentityPools/<POOL_ID>/providers/<WORKLOAD_PROVIDER_ID>
Issuer URL:
The Issuer Format will need to be modified depending on the environment cluster in which your account resides. In Account Settings -> Account Details, you can see the Harness Cluster that your account resides in.
The Issuer URL format should follow https://<HOSTNAME>/ng/api/oidc/account/<YOUR_HARNESS_ACCOUNT_ID>.
The hostname should be as follows, even if a Vanity URL is set up for an account.
| Cluster | HostName |
|---|---|
| Prod1/Prod2 | app.harness.io |
| Prod3 | app3.harness.io |
| Prod0/Prod4 | accounts.harness.io |
| EU clusters | accounts.eu.harness.io |
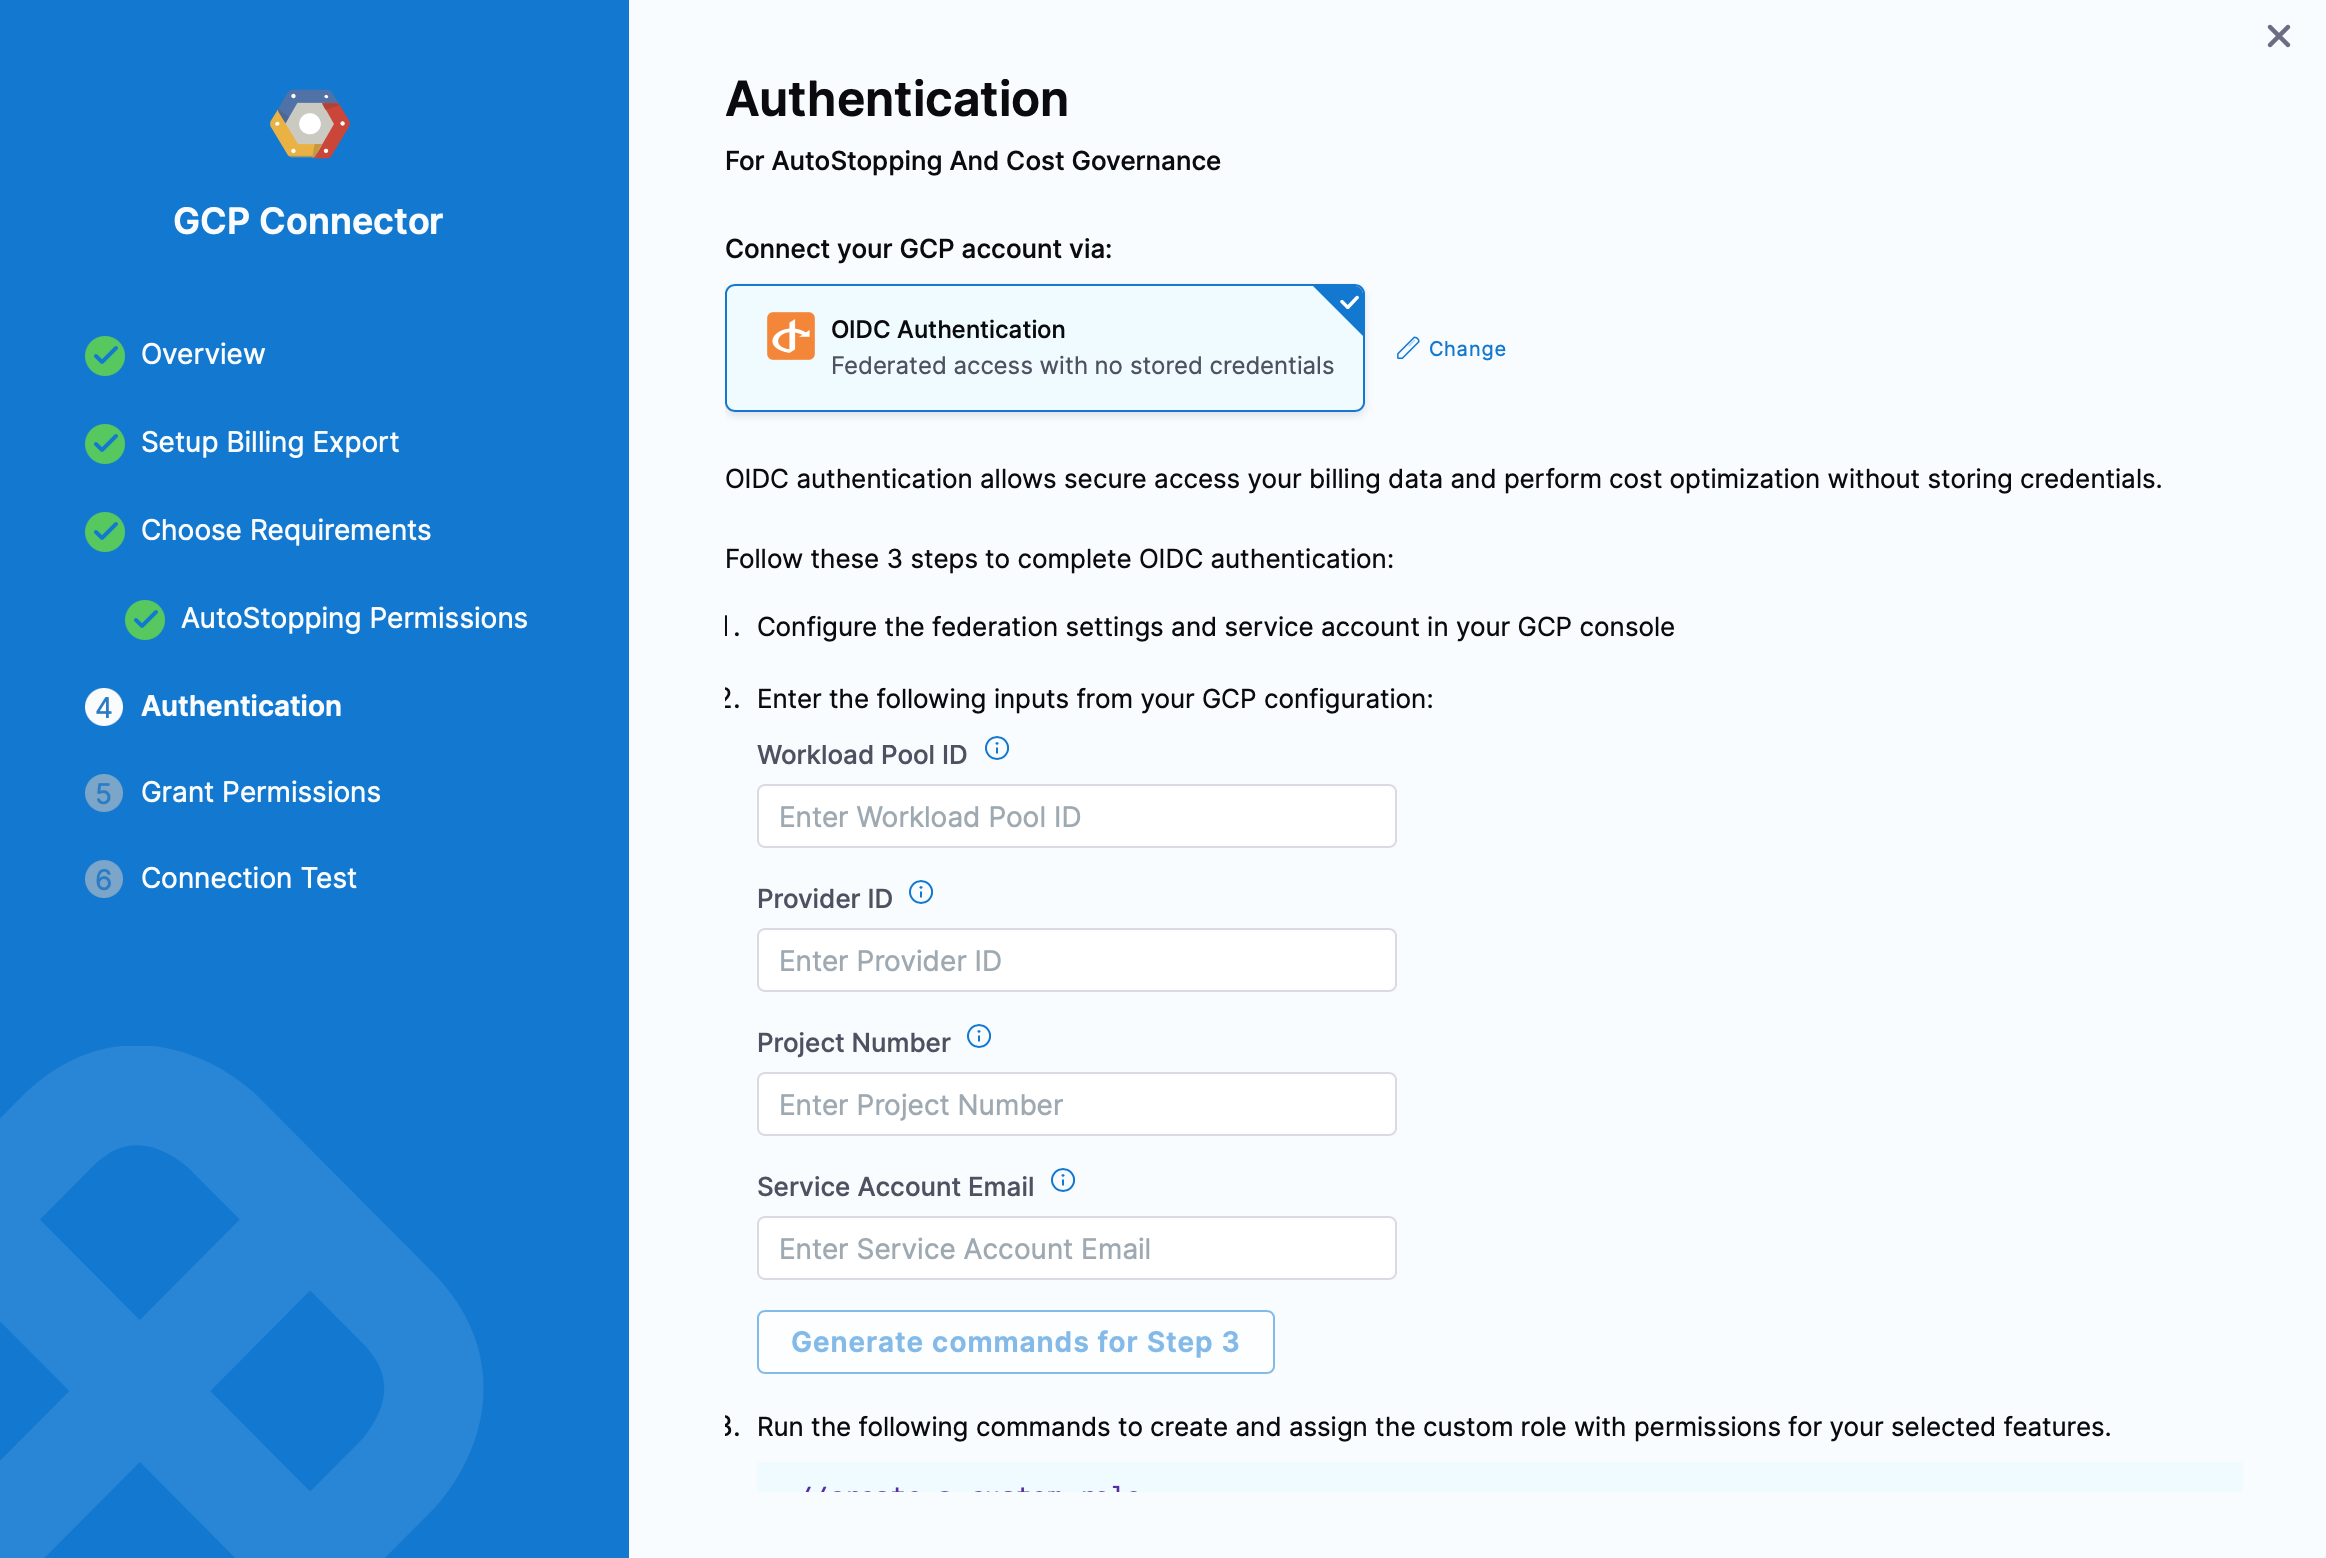
Follow the steps on the Authentication page to complete OIDC authentication:
-
Configure the federation settings and service account in your GCP console. Read more about it: Workload Identity Federation
-
Enter the following inputs from your GCP configuration:
- Workload Pool ID: This identifies the workload pool created in GCP, and it is the Pool ID value. To get the Workload Pool ID, go to Manage workload identity pools.
- Provider ID This identifies the OIDC provider configured in GCP, and it is the Provider ID value. To get the Provider ID, go to Manage workload identity pool providers.
- Project Number: The project number of the GCP project that is used to create the workload identity federation. To get the Project number, go to Creating and managing projects.
- Service Account Email: This is the service account that was linked to the workload identity pool in the last step.
If AutoStopping Granular Rules are selected, you will be prompted to generate commands. Click on Generate commands for step 3 and run the commands listed on screen to create and assign the custom role with permissions for your selected features.